
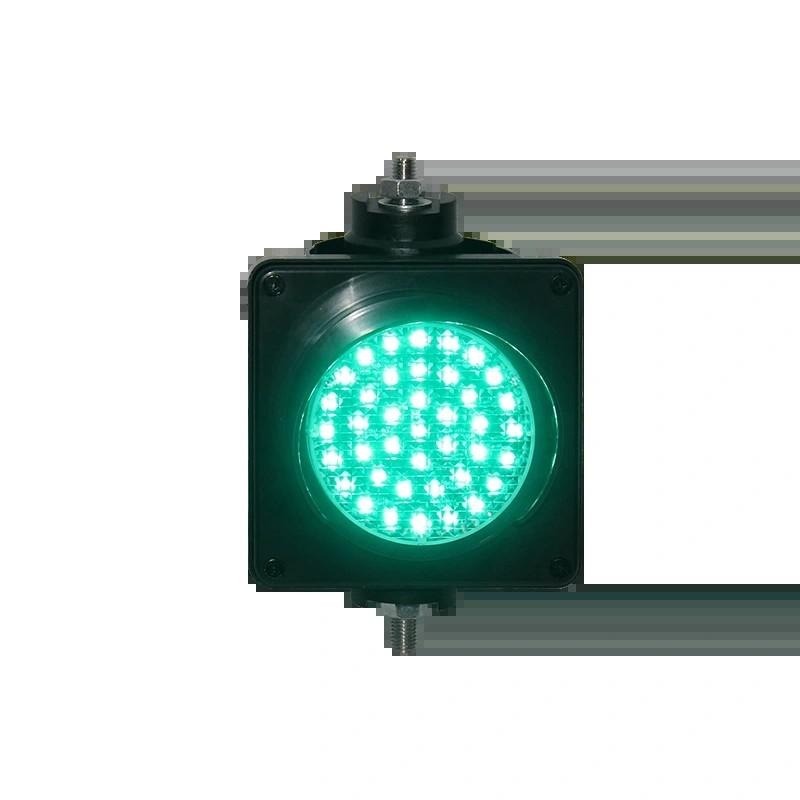
A single-aspect signal is one of the simplest electrical devices you will ever install: power in, light out, controlled by whatever switches the condition. Yet installations still go wrong in predictable ways, usually around mounting height, sun visibility, and control wiring. This guide walks through a clean installation of a 100MM traffic light one aspect from bracket to final test.
Planning the Mount
Height and angle decide whether the lamp is seen. Mount the unit so the lens faces approaching traffic squarely, typically 2 to 3 meters above ground for vehicle applications, lower for pedestrian or doorway use. Avoid positions where the rising or setting sun shines directly into the lens, which washes out even bright LEDs; a visor helps, but placement helps more. The housing is light, so a single sturdy bracket on a post, wall, or beam suffices, but make it rigid: vibration loosens connections over time and makes the lamp appear to flicker. Before drilling anything, hold the 100MM traffic light one aspect in position and sight along the approach path to confirm the sightline.
Power and Wiring
Check the unit’s rated voltage before anything else; most mini signals come in 12V DC, 24V DC, or 110-240V AC versions, and they are not interchangeable. Run appropriately rated cable in conduit or trunking, keep low-voltage DC runs short to avoid voltage drop, and fuse the circuit at the supply. The lamp itself is just a load: switched live in, neutral or negative return out. If the signal must survive power cuts, a small UPS or battery backup on the control side keeps the warning alive when it is needed most. Label every conductor at both ends; the next person to service this 100MM traffic light one aspect will thank you.
Connecting the Control
The control is whatever detects your condition: a loop detector for vehicles, a push button for manual alert, a timer for scheduled warnings, a relay from an alarm panel for emergency signaling. Wire the control as a simple switch in series with the lamp supply, or use a relay if the control circuit and lamp voltages differ. For flashing operation, add a flasher module rated for LED loads; old thermal flashers designed for incandescent bulbs misbehave with the tiny current LEDs draw. Draw the circuit on paper before touching a wire; five minutes of planning prevents most wiring mistakes.
Testing and Commissioning
Test in daylight, not just at dusk when every lamp looks bright. Walk the approach path a driver or pedestrian takes and confirm the lamp is unmistakable at the required distance. Cycle the control through its full sequence several times, checking that the 100MM traffic light one aspect responds crisply with no flicker or delay. Then test the failure mode: kill the power and confirm the site fails safe, meaning the absence of the warning does not create a worse hazard than its presence was preventing.
Common Installation Mistakes
- Mounting flat against a wall with no visor, then discovering the lamp is invisible at noon.
- Mixing voltages: feeding 24V DC into a 12V unit, or AC into a DC-only lamp.
- No drip loop or sealed entry, letting rain track down the cable into the housing.
- Skipping the fuse because it is only a small lamp; small lamps start fires too.
- Forgetting maintenance access: mount where a ladder can reach it for lamp checks.
Handing Over and Documenting
Label the circuit at the distribution board, leave the wiring diagram with the facilities file, and show the site team how to test the lamp. Record the installation date, the lamp’s rated life, and the control logic in plain language: what turns it on, what turns it off, who to call when it misbehaves. A five-minute handover turns an installation into infrastructure instead of a mystery box on the wall, and it ensures the 100MM traffic light one aspect keeps protecting the site long after the installer has left.
Solar and Battery Power for Remote Sites
Many single-aspect signals guard locations with no mains power: rural gates, remote crossings, construction entrances. Solar is the natural answer, and the 100MM traffic light one aspect is an ideal solar load because it draws only a few watts. A small 20 to 50 watt panel with a sealed lead-acid or lithium battery typically provides several days of autonomy, and a simple charge controller prevents over-discharge. Size the battery for the worst-case duty cycle: a lamp that flashes continuously through long winter nights needs far more storage than one that illuminates briefly a few times a day. Mount the panel facing the equator at a tilt matching your latitude, keep it clear of shade and dust, and the installation becomes genuinely fit-and-forget, which is exactly what remote sites need.
Pre-Install Checklist
Run through this list before touching a tool. Confirm the exact mounting location and sightline with the site owner, walking the approach path at the relevant times of day. Verify the voltage version matches the supply you will connect; the 100MM traffic light one aspect is ordered in a specific voltage and the wrong one will not forgive the mistake. Gather the bracket, fixings, cable, glands, fuse, and control device before starting, because mid-job supply runs double the installation time. Check you have the wiring diagram and understand the control logic fully. Notify anyone affected by the work, especially if the installation interrupts an existing safety system even briefly. And charge your phone: you will want photos of the finished wiring for the facilities file. Installations that start with this checklist finish in one visit; those that skip it finish in three.
Document everything, test twice, and the 100MM traffic light one aspect will serve silently for years. That quiet reliability is the true measure of a good installation, and it starts with respecting the humble 100MM traffic light one aspect as the safety device it is.
Choose the 100MM traffic light one aspect wisely.