
If you’ve ever sat down to enjoy a movie night only to be disappointed by flat, compressed audio coming through your home theater system, you’re not alone. Many HDMI sources deliver video beautifully but fall short on audio fidelity, especially when your setup relies on dedicated sound equipment that can’t directly accept HDMI input. The gap between what your source delivers and what your audio system can receive often results in a compromised listening experience that undermines even the best speaker configurations.
HDMI to SPDIF audio extractors offer an elegant solution to this problem, allowing you to separate high-quality digital audio from your HDMI signal and route it directly to receivers, soundbars, or DACs that accept optical or coaxial connections. For home theater enthusiasts who demand immersive, full-fidelity sound without complicated rewiring, these devices bridge the gap effortlessly. In this guide, we’ll walk through everything you need to know—from understanding how these audio extractors and converter adapters work, to a complete step-by-step installation process, troubleshooting tips, and comparisons with alternative solutions.
Understanding DAC Audio Converters and HDMI to SPDIF Extractors
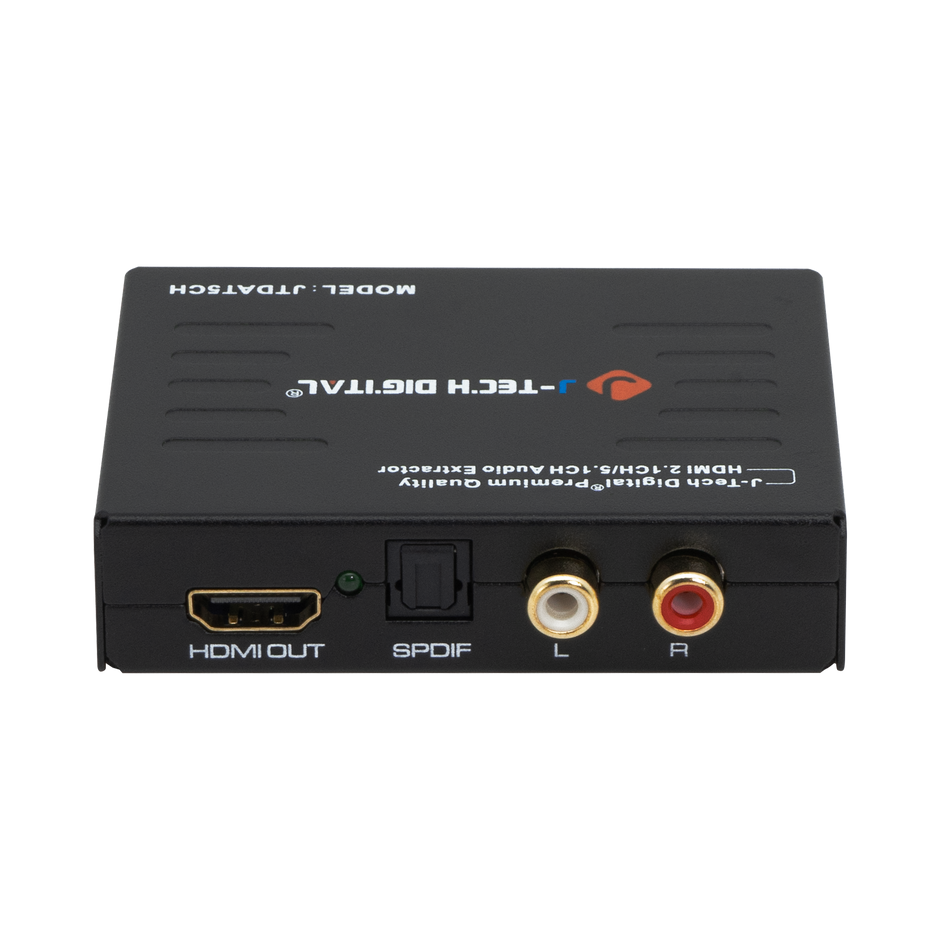
An HDMI to SPDIF audio extractor is a compact device that intercepts the combined audio and video stream carried by an HDMI cable, strips out the audio data, and outputs it through a dedicated SPDIF connection—either optical (Toslink) or coaxial. The video signal passes through untouched to your display, while the extracted audio travels separately to your sound system. These converter adapters act as intelligent signal splitters, ensuring both your television and audio equipment receive exactly what they need without compromise.
At the heart of many audio extractors lies DAC (Digital-to-Analog Converter) technology. While SPDIF itself carries a digital signal, some extractors also include analog outputs powered by built-in DACs that convert the digital bitstream into analog audio suitable for older amplifiers or powered speakers. This dual-output capability makes them versatile tools for home theater setups where equipment spans multiple generations. For enthusiasts seeking enhanced audio experiences, the ability to bypass a television’s inferior internal processing and route pristine digital audio directly to a dedicated receiver or DAC audio converter represents a significant upgrade in sound quality.
How DACs Enhance Audio Quality in Extraction
The DAC components within higher-end audio extractors do more than simple conversion—they actively preserve audio integrity throughout the extraction process. Quality DAC chips minimize jitter, the subtle timing errors that introduce distortion and muddy the soundstage. They also support high-resolution audio formats up to 24-bit/192kHz, ensuring that lossless tracks from Blu-ray discs or streaming services maintain their full dynamic range. For home theater enthusiasts who invest in capable speakers and room acoustics, this level of fidelity preservation means the difference between hearing a flat reproduction and experiencing the spatial depth, tonal accuracy, and detail that the original recording intended.
Why Home Theater Enthusiasts Need High-Quality Audio Separation
Modern home theater systems often combine components from different eras and manufacturers, creating a patchwork where HDMI-equipped sources like gaming consoles, streaming boxes, and Blu-ray players need to communicate with audio receivers that only accept optical or coaxial inputs. Without proper audio separation, enthusiasts face an uncomfortable choice: route everything through the TV’s built-in speakers or accept the degraded audio that comes from a television’s headphone jack or ARC connection. Neither option does justice to a carefully curated surround sound system.
High-quality audio separation transforms the home theater experience in tangible ways. Dialogue becomes crisp and centered, no longer fighting against compressed processing that flattens vocal nuances. Surround sound channels maintain their discrete separation, placing effects precisely where the mix engineer intended—behind you, above you, sweeping across the room. Bass response arrives with full authority rather than the rolled-off low end that often results from internal TV processing. For those running legacy receivers or dedicated two-channel amplifiers that lack HDMI inputs, audio extractors provide the only practical path to accessing the rich digital audio streams embedded in modern HDMI sources. The installation process remains straightforward enough that even those uncomfortable with complex wiring can achieve professional-grade results in minutes, making superior sound accessible without hiring a custom installer.
Step-by-Step Guide to Installing Your HDMI to SPDIF Audio Extractor
Preparation: Gathering Tools and Components
Before starting, collect everything you’ll need: the HDMI to SPDIF audio extractor itself, an HDMI cable from your source device, a second HDMI cable running to your display, an optical Toslink or coaxial cable for the audio output, and the extractor’s power supply (usually USB or a small DC adapter). Check your user manual to confirm that your source device’s HDMI output version is compatible with the extractor’s supported resolutions and audio formats. Verify that your audio receiver’s SPDIF input matches the extractor’s output type—optical and coaxial are not interchangeable without an additional adapter. Power down all connected equipment before making any connections to prevent potential HDCP handshake errors or signal damage.
Connection: Setting Up HDMI and SPDIF Cables
Start by connecting an HDMI cable from your source device—whether it’s a Blu-ray player, gaming console, or streaming box—into the extractor’s HDMI input port. Next, run a second HDMI cable from the extractor’s HDMI output to your television or projector. This passthrough connection ensures your display continues receiving full-resolution video without any degradation. Now connect your optical Toslink or coaxial cable from the extractor’s SPDIF output to the corresponding input on your audio receiver, soundbar, or external DAC. Seat each connector firmly; loose HDMI connections are the most common cause of intermittent signal drops. Route cables away from power strips and other electronics to minimize potential electromagnetic interference. If your extractor includes a dedicated power input, connect it last—some units draw power from the HDMI connection itself, but those with separate power supplies typically deliver more stable performance and better HDCP compatibility.
Configuration: Adjusting Settings for Optimal Audio
Power on your source device, display, and audio receiver, then supply power to the extractor. Most units feature a small toggle switch or button that selects between audio output formats—typically PCM stereo for two-channel systems and bitstream passthrough for Dolby Digital or DTS surround sound. Select bitstream if your receiver can decode surround formats natively, as this preserves multi-channel information. If you’re feeding a stereo amplifier or a DAC without surround decoding, choose PCM so the extractor handles the downmix internally. On your source device, navigate to audio settings and ensure the output is set to bitstream or auto rather than a format your extractor cannot pass through.
Testing: Verifying Audio Output and Quality
Play a familiar movie scene or music track and confirm audio reaches your speakers with proper channel assignment. Listen for any lip-sync delay—if dialogue arrives slightly ahead of or behind the video, adjust your display’s audio delay setting or use your receiver’s lip-sync compensation. Switch between multiple sources to verify consistent performance across all connected devices.
Troubleshooting Common Installation Issues
Even with careful setup, HDMI to SPDIF audio extractors can occasionally present challenges that frustrate an otherwise smooth installation. The most frequent issue is complete audio silence—your display shows video perfectly, but nothing reaches your speakers. Before assuming the extractor is defective, check the basics systematically. Confirm that your receiver is set to the correct SPDIF input and that its volume isn’t muted. Verify that the optical or coaxial cable is fully seated on both ends, as Toslink connectors in particular require a firm click to engage properly. If you’re using an optical connection, inspect the cable ends for dust or damage to the fiber, and confirm you see a faint red glow when the extractor is powered on.
Fixing No Sound or Distorted Audio
When audio extractors produce no sound, the culprit is often an audio format mismatch. If your extractor is set to bitstream passthrough but your receiver doesn’t support the specific codec being sent—such as Dolby TrueHD or DTS-HD Master Audio over SPDIF, which the format cannot carry—you’ll get silence. Switch the extractor to PCM mode or change your source device’s audio output to standard Dolby Digital or DTS. For distorted or crackling audio, replace your SPDIF cable first, as damaged optical fibers or corroded coaxial connectors frequently cause signal degradation. If problems persist, disconnect the extractor’s power for thirty seconds to reset its internal handshake, then reconnect. Some audio extractors also support firmware updates through USB—check the manufacturer’s website for patches that resolve compatibility issues with newer source devices. Persistent lip-sync problems that can’t be corrected through receiver delay settings may indicate the extractor is processing audio slower than the video passthrough, in which case enabling your display’s game mode or low-latency setting can reduce the visual processing time to match.
Comparing HDMI to SPDIF with Other Converter Adapters
When evaluating converter adapters for home theater audio, HDMI to SPDIF extractors occupy a distinct niche compared to alternatives like HDMI to RCA adapters. HDMI to RCA converters strip the signal down to analog composite video and stereo audio, making them suitable for connecting modern sources to vintage televisions or basic sound systems—but they sacrifice digital audio quality entirely and cannot pass surround sound information. HDMI to SPDIF extractors, by contrast, preserve the digital audio stream intact, supporting multi-channel formats like Dolby Digital and DTS that define the home theater experience. Manufacturers specializing in AV signal processing, such as J-Tech Digital Inc, offer extractors designed with robust HDCP compliance and reliable format support that address common compatibility headaches. For enthusiasts prioritizing audio fidelity and surround capability with legacy receivers, SPDIF extraction remains the superior choice. HDMI to RCA adapters serve a different purpose—maximum backward compatibility at the cost of quality—while SPDIF extractors deliver the best possible sound from modern sources without requiring a full HDMI-capable receiver upgrade.
Unlock Your Home Theater’s Full Audio Potential
Installing an HDMI to SPDIF audio extractor is one of the most impactful yet straightforward upgrades a home theater enthusiast can make. By separating high-quality digital audio from the HDMI signal and routing it directly to a dedicated receiver or DAC, you unlock the full potential of your sound system without replacing expensive equipment or running complicated wiring. The step-by-step process—gathering compatible components, making secure physical connections, selecting the right audio format, and verifying output—takes just minutes but delivers results you’ll appreciate every time you press play.
DAC technology within these audio extractors ensures that the signal reaching your speakers maintains its original fidelity, free from the jitter and compression that television processing introduces. Whether you’re running a multi-channel surround system with a legacy receiver or feeding a high-end stereo amplifier, these converter adapters provide the bridge your setup needs. Compared to alternatives like HDMI to RCA adapters, SPDIF extraction preserves the digital integrity and surround sound capability that define a true cinematic experience. Invest in a reliable audio extractor, follow this guide, and transform your home theater from visually impressive to sonically immersive.